Showing posts with label cooking. Show all posts

Sunday, October 9, 2011

Corn Stuffing

It is October. It is also, for whatever reason, still in the high 70's here, which seems pretty unusual for this time of year in Minnesota. My seasonal meal planning has shifted over to fall, which must mean I'm ready for it, but the weather outside remains warm and pleasantly breezy.

Presumably it is behaving like fall somewhere, and it will eventually do so here, as well. In the meantime, I'm cooking as though the temperatures are about 30 degrees lower than they are, and that suits me just fine.

Today I roasted a chicken. If you'd like to know how, or to be reminded of how insanely straightforward it is to accomplish this in your very own kitchen, I wrote all about it two winters ago, right here.

I also made corn stuffing today. That I will talk about, because it was my first effort at such a project, and I can heartily recommend it. It so happens that last night I made cornbread (the recipe on the Quaker cornmeal box is quick and easy), and today I realized that I had half a pan of it left, and it occurred to me that perhaps corn stuffing would be just the thing to accompany the chicken I was about to pop in the oven.

Say what you will about Rachael Ray, but her cookbooks contain simple recipes for food I want to eat. In this case, I turned to Get Togethers, which was a thoughtful gift from my sister a few years ago. This cookbook is arranged into meals, but I found a corn stuffing recipe buried in her "Giving Grazie: Italian-Style Thanksgiving" meal, adjusted it slightly (as it called for celery and prosciutto, neither of which I had on hand), and subbed in half a pan of leftover cornbread for the "three corn muffins, crumbled" that the recipe suggests. I also added a can of mushrooms to replace the bulk of those ingredients I skipped.

Here's what I made, and it is delicious:

Corn Stuffing
adjusted from Rachael Ray's "Corn, Sage, and Prosciutto Stuffing"

1 Tbsp olive oil
2 Tbsp butter
1 medium onion, chopped
1 small can mushrooms, drained
salt and pepper, to taste
2 tsp poultry seasoning (I used Bell's)
2 sprigs dried sage, chopped (2 Tbsp)
half a pan of leftover cornbread (or 3 corn muffins)
1 cup chicken broth

Heat a skillet over medium-high heat, combine olive oil and butter. When the butter melts into the oil, add the onion, mushrooms, salt and pepper, and poultry seasoning. Saute 5 minutes, until onions are softened. Add sage, stir to combine. Crumble cornbread into the pan. Moisten with broth and heat through. Remove from heat, and cover with foil to keep warm.

Monday, June 27, 2011

Pasta Primavera

A few months ago, when spring-like vegetables were beginning to show up at the grocery store, but it was still rather chilly and rainy outside (and in these northern states, spring-like vegetables were still very much in hibernation), I made this pasta for book club. It was a big hit, and I suspect that now that it is mid-June, those of us in northern climates can obtain many of these ingredients locally – maybe even at farmer’s markets.

Gourmet published a “Passover Pasta Primavera” recipe in April 2008 that included a way to make the pasta from matzo meal, and in March 2011, thekitchn.com rounded up “7 Fresh Ideas for Spring Pastas” and this one made the cut. I used standard linguine rather than making the matzo meal pasta, but otherwise I followed the recipe quite precisely, and I was pleased with the results.

I recommend cutting all the vegetables, but particularly the asparagus, at an angle. Big diagonal “coins” look nice and cook quickly, and take less effort than painstakingly cutting long skinny vegetables into a million small discs. Apparently in cooking lingo, I’m talking about “Bias Slicing” – and if you’d like an explanation, with photos, you can find that on the Better Homes and Gardens website.

Pasta Primavera
1 lb pasta (linguine or fettucine)
2 Tbsp olive oil
1/2 lb asparagus, trimmed and thinly sliced, leaving tips whole
1 medium zucchini, halved lengthwise, then thinly sliced crosswise
1 cup frozen peas
6 scallions, thinly sliced, keeping white and pale green parts separate from greens
1/3 cup grated Parmigiano-Reggiano plus some for serving
1 tsp grated lemon zest

Cook in a pasta pot of boiling salted water until just tender, 1 to 2 minutes. Reserve 1 cup cooking water, then drain pasta in a colander.

Heat oil in a 12-inch heavy skillet over medium-high heat until it shimmers, then saute asparagus, zucchini, peas, white and pale green parts of scallions, and 1/2 tsp salt, stirring occasionally, until vegetables begin to soften, about 5 minutes.

Add 1/2 cup reserved cooking water to vegetables and cook, shaking skillet occasionally, until vegetables are just tender, about 2 minutes. Stir in pasta and scallion greens until just coated with sauce. Remove from heat and stir in cheese and zest. Stir in more reserved water if desired. Serve with additional parmesan.

Thursday, June 23, 2011

Spectacular Potato Salad

I have recently claimed that some recipes are too good to be kept to oneself, and this potato salad is one such recipe. As many people know, the folks at America’s Test Kitchen truly know what they are up to in the kitchen. I love (love, love, love) my copy of Cook’s Country, which is chock full of the kind of recipes that grandmothers pass down, but better. They took the recipes that lots of grandmothers passed down, compared them, took the best parts of each, tested ingredients and cooking times, and recommend here the foolproof (in my experience) version with the best results. In the case of potato salad, it seems straightforward enough, right? Cook up some potatoes, cook up some eggs, mix them together with mayonnaise and some chives or something, and call it a day.

Sure, sometimes that works. And sometimes the potatoes are too soft, the eggs are too smashed up, the mayonnaise becomes soupy, or the whole thing tastes like…. potatoes and eggs, sitting in mayonnaise.

Enter Cook’s Country, and their genius potato salad recipe. I made it this weekend as a barbeque contribution, and the host jokingly asked guests not to take too much, as she wanted to be sure to have leftovers. It’s that good. Follow this recipe closely and I feel that you can not go wrong.

All-American Potato Salad
2 lbs Yukon gold potatoes, peeled and cut into 3/4 inch cubes
salt
3 Tbsp dill pickle juice
1/4 cup finely chopped dill pickles
1 Tbsp yellow mustard
1/4 tsp pepper
1/2 tsp celery seed
1/2 cup mayonnaise
1/4 cup sour cream
1/2 small red onion, minced
1 celery rib, chopped fine
2 hard-boiled eggs, peeled and cut into 1/4 inch dice

Place the potatoes in a large saucepan with cold water to cover by 1 inch. Bring to a boil over high heat, add 1 tsp salt, reduce the heat to medium-low, and simmer until the potatoes are tender, 10 to 15 minutes.

Drain the potatoes thoroughly, then spread them out on a rimmed baking sheet. Mix 2 Tbsp of the pickle juice and the mustard together in a small bowl, drizzle the pickle juice mixture over the potatoes, and toss until evenly coated. Refrigerate until cooled, about 30 minutes.

Mix the remaining 1 Tbsp pickle juice, the chopped pickles, 1/2 tsp salt, pepper, celery seed, mayonnaise, sour cream, red onion, and celery in a large bowl. Toss in the cooled potatoes, cover, and refrigerate until well chilled, about 30 minutes. Gently stir in the eggs, just before serving. The salad can be refrigerated in an air tight container for up to 2 days.

Saturday, June 18, 2011

Hello, again.

Well. It's not like hundreds of people were ever reading this blog, but I do believe that we've had some loyal followers in the past. Perhaps if we're ever so apologetic about the large gap in our posts (yikes, our last post was in November!!), a few of you will continue to keep an eye on this effort. I won't bore you with the details about how busy we have been, but life has its way of throwing surprises at you, and before you know it, you look up and it's June of 2011. Imagine that!

Rest assured that I have been making delicious food, and I know that my one and only sister has been doing so, as well. In fact, I've made some food so delicious that I felt rather bad keeping it to myself. Good recipes should be shared, I believe. (Perhaps that sister of mine will share a recipe or two sometime soon, as well!) On that note, here's one that I made this morning, with outstanding results. It's from Molly Wizenberg's blog, Orangette, which I highly recommend. She actually wrote about it last spring, in a post called "You Deserve a Waffle" - and what a good point she makes, really. I made this waffle last summer, noted "Delicious!" on the scrap of paper on which it was printed, and tucked it away. Since then, I made some other waffle recipes that were dreadfully disappointing, and those experiences taught me not to take a good waffle recipe for granted. This is a seriously good waffle recipe. If you don't own a waffle iron, this recipe is good enough reason to purchase one.

A Great Make-the-Morning-of-Waffle
adapted from the "Waffle of Insane Greatness" recipe

3/4 cup all-purpose flour
1/4 cup cornstarch
1/2 tsp baking powder
1/4 tsp baking soda
1/2 tsp salt
1 1/2 tsp sugar
1/2 cup whole milk (I used 2%, which worked fine)
1/2 cup buttermilk
1/3 cup vegetable oil, such as canola
1 large egg, lightly beaten
3/4 tsp vanilla extract

In a medium bowl, combine the flour, cornstarch, baking powder, baking soda, salt, and sugar. Whisk well. Add the milk, buttermilk, vegetable oil, egg, and vanilla extract. Whisk to blend well, so that few (if any) lumps remain. Set aside to rest for 30 minutes.

Preheat a waffle iron. Follow your waffle maker's instruction manual, or aim for medium-high. (My waffle iron just has "on" and "off" - so I just plugged it in, and that worked fine). There's no need to grease the waffle iron.

Pour an appropriate amount of batter into your hot waffle maker - this takes some practice to determine, actually, but try not to put so much that it oozes out the sides. Cook until golden and crisp.

Monday, November 22, 2010

Fish Otis

The Moosewood Cookbook that I have is primarily vegetarian, but does include some fish recipes, and this is an excellent one. It calls for "firm fish fillets" and assumes there will still be a side with skin attached. I used skinless tilapia fillets this time, but I suspect it'd be even better with something a bit heftier, like cod. The sour cream and dill are a nice flavor, and when served on egg noodles as the recipe suggests, the sauce mingles with the noodles well. Paired with a salad or simple vegetable, this is a quick and rewarding weeknight meal!

Fish Otis
Serves 2

10-12 ounces firm fish fillets
4 tsp fresh lemon juice
2 tsp chopped fresh dill (or 3/4 tsp dried)
dash of salt and pepper
1/3-1/2 cup sour cream
2-3 thick slices red onion

Preheat the oven to 375. Rinse and dry the fish fillets and place them, skin side down, in an oiled baking pan. Sprinkle with the lemon juice, dill, salt and pepper. Spread the sour cream evenly over the fillets. Break the onion slices into rings and press them into the sour cream.

Cover the pan and bake until the fish is no longer translucent and flakes easily with a fork. The amount of time varies with the thickenss of the fish, but it usually takes 25 to 30 minutes.

Thursday, October 28, 2010

Shepherd's Pie

Sometimes, when the wind is blowing at record breaking speeds, darkness is setting in before you leave work, and a long winter lies ahead, you just want to eat something comforting. Furthermore, you want to eat it soonish, and with very little effort involved. Boy, do I have the recipe for you! In October of 2007, this Easy Shepherd's Pie recipe caught my attention, and it was just exactly what I found myself wanting to eat this week.

I got Real Simple magazine for a couple of years, until their suggestions started to feel familiar and the recipes I had flagged in them were piling up. I decided, at that point, not to resubscribe. But I certainly flip back through the old issues, and I recently found that you can find recipes very easily on their website - in this case, I knew what I was looking for, I just wasn't sure which old issue I would find it in. You can do searches by keywords or ingredients or cuisines or all variety of other options.

Here it is - the shamelessly modernized and Americanized version of what I imagine to be a centuries old tradition... probably involving meat scraps and whatever else was lying around! This version requires mostly things I have on hand, and a few things I can purchase with ease if I must. It takes 10 minutes to cook the beef and preheat the oven, 10 minutes to bake. Read beyond the recipe for my tips related to speeding up the mashed potato element of this recipe.

Easy Shepherd's Pie
Real Simple, October 2007

Heat the oven to 400.
Brown 1 lb ground beef.
Stir in 1/3 cup ketchup and 1 tsp Worcestershire sauce.
Add 8 oz of mixed frozen vegetables (carrots, peas, corn, green beans - whatever - thawed).
Cook one minute.
Put in a baking dish.
Mix 1 lb of mashed potatoes with 1/4 cup cheddar (cheese is optional).
Spread potatoes on top of beef and vegetables.
Bake 10 minutes.
Enjoy!

In my case, I realized on Tuesday that I wanted to eat Shepherd's Pie, but I was unwilling to leave the house for ingredients. I looked up the recipe, moved a variety of frozen vegetables into the refrigerator to get a start on thawing, and I made a huge batch of mashed potatoes for dinner (with chicken and carrots, because I had those on hand, but that's a story for another time). If I'd had ground beef in the freezer, I would have shifted that over to thawing mode, as well. But I didn't, so I started a grocery list, instead.

Tonight after work I stopped for ground beef, came home, threw the recipe together, and I'm eating it now, while I write this post!

Here's my note about mashed potatoes. Real Simple suggests that you buy a 1 lb bin of pre-made mashed potatoes from the grocery store. I did that once, just out of curiosity, and they were actually quite good, and did eliminate the need to make mashed potatoes. However, if the goal is to make this recipe quickly, I solved that problem this time by making the potatoes in advance, so the shepherd's pie took less than 30 minutes to make. Also, mashed potatoes are incredibly easy. Here's roughly how Rachel Ray suggests doing it, in her Get Togethers cookbook:

Mashed Potatoes
Peel and cut into chunks, 1 pound of potatoes (2 large potatoes).
Place them in a pot, covered with water. Cover the pot, bring to a boil, and lightly salt. Leave uncovered and simmer at a rolling boil until tender, 8-10 minutes.
Drain the potatoes, and return them to the hot pan. Mash them with half-and-half, butter, cream, milk, roasted garlic, Boursin cheese, or whatever else you like.

I used a generous splash of half-and-half, a few tablespoons of butter, salt and freshly ground pepper. I had cooked three or four large handfuls of tiny potatoes, which I did not peel, as I know they were grown organically and their peel is therefore very good for me, and not at all chemical-ridden as some peel may very well be (mine are from our well stocked CSA box potato supply!).

Tuesday, October 12, 2010

Red Rice

I once mailed $10 or so to the folks at Better Homes and Gardens, and they have been sending me their magazine for more than two years as a consequence. I know from the ominous letters and postcards that I've been receiving from them lately that the October issue was my last, and that's okay. I've enjoyed their magazine, and gotten some great recipes from them, but as a single person who lives in an apartment, I can't do much with their hosta replanting schemes or their children's birthday party decorating ideas. Better Homes and Gardens tends to be a casserole and cookies kind of recipe source, but recently, they've started running a column by chef Scott Peacock that gets to the bottom of "American Home Cooking" with traditional recipes for more complicated fare than usually gets tackled here. The "Shrimp-and-Sausage Red Rice" recipe in this column of the September issue was quite possibly life changing and most certainly repertoire changing. In fact, if this recipe was the only thing I ever got from the experience (though it wasn't - I have a few other standard favorites that I discovered in this magazine), the two years were totally worth it.

If I ate this meal at a restaurant, I would bring all my friends back over and over again to share the experience. Instead, I plan to cook it a lot in the future and share it with my friends that way! I cooked the entire recipe, which serves 6. I ate it for two dinners and two lunches, and froze the rest of it. I can't wait to thaw it out and eat the rest. It is absolutely phenomenal.

Shrimp-and-Sausage Red Rice
(don't ask me why it's hyphenated, I'm just writing what I see)
Better Homes and Gardens, September 2010

3 Tbsp bacon drippings
1/2 cup chopped onion
1/2 cup chopped green sweet pepper
1 small jalapeno pepper, seeded and finely chopped (Careful! Don't get burned!)
3 cloves garlic, minced
1/2 tsp dried thyme, crushed
1/2 tsp crushed red pepper (optional)
1/2 tsp kosher salt
freshly ground pepper
1 14.5 oz can whole tomatoes, drained and crushed
1 rounded Tbsp tomato paste
2 cups chicken stock or water (I used chicken stock)
1 Tbsp butter
1 cup long grain rice
8 oz andouille or cooked, smoked chorizo sausage, sliced in 1/2 inch rounds
1 cup sliced fresh okra (this recipe made me appreciate okra - be sure to use it!)
1 lb peeled and deveined shrimp (I used frozen cooked shrimp, thawed and drained)

In a large skillet heat bacon drippings. Add onion; cook over medium-low heat without stirring for 5 minutes. Add the sweet pepper, jalapeno, garlic, thyme, and crushed red pepper. Sprinkle with 1/2 tsp salt and a few grinds of black pepper. Cook over low heat for 8 to 10 minutes or until onion and pepper are soft but not browned.

Add tomatoes and tomato paste. Stir in stock; bring to a simmer. Cover and simmer gently for 15-20 minutes. Taste carefully for seasoning (broth should be highly seasoned to flavor the rice).

In a heavy, wide-bottom nonreactive pot or heavy 12-inch skillet heat butter over medium heat until melted. Add rice; cook, stirring constantly, for 1-2 minutes until rice becomes translucent. Carefully stir in the hot tomato mixture. Cover quickly and cook over low heat for 20 minutes. Add the sausage and okra, mixing in gently with two forks. Return cover and cook 10 minutes longer over very low heat, just until most of the liqued is absorbed and the rice is tender.

Sprinkle shrimp lightly with salt and pepper. Stir the shrimp into the rice mixture. Cover and cook 3 minutes longer, just until shrimp is opaque. Remove from heat and let rest for 5 minutes before serving.

Tuesday, September 7, 2010

Fresh Corn Pesto!

I am the very lucky recipient of a gift subscription to bon appetit, courtesy of my generous and lovely sister! The August issue featured lots of recipes for creative uses of corn, tomatoes, and zucchini. Some seemed a little too creative (Tomato Tarte Tatin, for example, which involves sugar, vanilla, and puff pastry)... and some a little too labor intensive (like the Shaved Zucchini Salad, which requires turning two pounds of zucchini into ribbons with a vegetable peeler)... but the Fresh Corn Pesto looked reasonably straightforward, I had fresh corn on hand from the CSA box, bacon was on the ingredient list, and the recommended vehicle for the recipe was pasta. I figured I couldn't really go wrong. Besides, my immersion blender (also courtesy of Elspeth) has an attachment that is just perfect for any pesto-like creations.

Happily, my bowl of Fresh Corn Pesto, served on pasta, looked nearly identical to what is pictured in the magazine - and tasted delicious, too! I took the leftovers for lunch the next day and they heated up in the microwave just fine.

Tagliatelle with Fresh Corn Pesto (serves 6)
* I cut the recipe in half, and served it on fettucine.

4 bacon slices, cut lengthwise in half, then crosswise into 1/2-inch pieces
4 cups fresh corn kernels (cut from about 6 large ears)
1 large garlic clove, minced
1 1/4 tsp coarse kosher salt
3/4 tsp freshly ground black pepper
1/2 cup freshly grated Parmesan cheese plus extra for serving
1/3 cup pine nuts, toasted
1/3 cup extra-virgin olive oil
8 ounces tagliatelle or fettucine
3/4 cup coarsely torn fresh basil leaves, divided

Cook bacon in large skillet over medium heat until crisp and brown, stirring often. Using slotted spoon, transfer to paper towels to drain. Pour off all but 1 Tbsp drippings from skillet. Add corn, garlic, salt and pepper to drippings in skillet. Saute over medium high heat until corn is tender but not brown, about 4 minutes. Transfer 1 1/2 cups corn kernels to small bowl and reserve. Scrape remaining corn mixture into processor. Add 1/2 cup Parmesan and pine nuts. With machine running, add olive oil through feed tube and blend until pesto is almost smooth. Set pesto aside.

Cook pasta in large pot of boiling salted water until just tender but still firm to bite, stirring occasionally. Drain, reserving 1 1/2 cups pasta cooking liquid. Return pasta to pot. Add corn pesto, reserved corn kernels, and 1/2 cup basil leaves. Toss pasta mixture over medium heat until warmed through, adding reserved pasta cooking liquid by 1/4 cupfuls to thin to desired consistency, 2 to 3 miutes. Season to taste with salt and pepper.

Transfer pasta to large shallow bowl. Sprinkle with remaining 1/4 cup basil leaves and reserved bacon. Serve pasta, passing additional grated Parmesan alongside.

Sunday, August 29, 2010

CSA Discovery: Edamame

Yet again, the CSA box was full of delightful vegetables - and in this case, a watermelon, too. This is just my share of the box, which is to say that we actually received twice the bounty that you see pictured here. In a somewhat clockwise description, there is, pictured above: sweet corn, watermelon, cucumber, broccoli, shallot, basil, carrots, kale, beets, sweet peppers, a banana pepper, and a bag of edamame.

I have eaten edamame, but only at sushi restaurants. In fact, this is one of my favorite parts of going out to sushi - receiving the steamy dish of salty green pods, with a sort of fuzz on them (kind of like on a kiwi, but less threatening). You grab onto one with your teeth, and haul the little pea-sized soy bean deal out of the pod. It's delicious.

So, it was a pleasant surprise for me to discover that edamame grows in Wisconsin, and preparing the above mentioned dish is maybe the easiest thing, ever. I rinsed the pods, tossed them into an inch of boiling salted water, cooked them for 5 minutes, rinsed them in cold water, dumped sea salt over the top, and ate them. They tasted just like at a restaurant, but fresher, which was probably because they had literally been picked within 24 hours of me eating them.


Wednesday, August 18, 2010

Tomato Soup!

Consider this: it is mid-August, and everyone has too many tomatoes. If you know even one single person with a tiny bit of yard, or even a patio or a window sill wide enough for a tomato plant, they are currently trying with all their might to deposit at least a dozen tomatoes on you. They'll have a dozen more tomorrow. And the next day.

On Sunday, I received some tomatoes and put them in a bowl on my kitchen counter. On Monday, at work, there was a large bowl of tomatoes up for grabs (I passed on by them). On Monday night, I realized that the tomatoes on my counter were splitting, and not long for this world. I grabbed my absolutely reliable soup cookbook* from the shelf, and identified a recipe that looked straightforward and as though it would use up a pretty big pile of tomatoes. It called for three pounds, and I went ahead and assumed that was the amount I had in front of me (three moderately sized romas and four giant round something-or-others, bursting at the edges).

Here's where things really get good - I was able to parboil and peel the tomatoes immediately, and store them in the refrigerator until tonight (a full 48 hours later), when I got home at 9:15, hungry for tomato soup. I dumped the tomatoes and broth into a pan, brought it to boil, simmered for 10 minutes, stirred in 4 more ingredients, simmered for two minutes, plunged the absolutely genius immersion blender into the hot soup, and ate it. Immediately. It is absolutely delicious.

Furthermore, I suspect it will freeze very well. Which is good, because I plan to make a few more batches. One for each time I am inundated with must-eat-or-cook-immediately tomatoes.

Fresh Tomato Soup
3 lbs of ripe tomatoes (I eyeballed this, as noted above)
1 2/3 cup chicken or vegetable stock (I used the full can - 2 cups - of low sodium chicken broth)
3 Tbsp sun-dried tomato paste (I had a jar of sun-dried tomatoes in my fridge. I pureed 5 or 6)
2-3 Tbsp balsamic vinegar
2-3 tsp sugar
small handful of fresh basil leaves (I tossed in a few pinches of dried basil)
salt and ground black pepper

Cut a cross into the base of each tomato, and plunge into boiling water for 30 second
s. Refresh in cold water, peel off the skins, and quarter the tomatoes. (This took me all of 10 minutes, and then I stuck them in the refrigerator for 48 hours, until I had time to make and eat soup).

Put the tomatoes in a large pan and pour the broth over them. Bring just to the boil, reduce the heat, cover and simmer gently for 10 minutes until the tomatoes are pulpy.

Stir in the tomato puree, vinegar, sugar and basil. Season with salt and pepper, then cook gently, stirring, for 2 minutes. Process the soup in a blender or food processor, then return to a clean pan and reheat gently. Serve immediately.

I ate mine with a dollop of sour cream (naturally) and a grilled cheese sandwich featurin
g the odds and ends of some pepperjack that I found in my refrigerator. (I haven't done an official grocery store trip since the road trip last week).

*A note about cookbooks. This recipe is from a giant hard-cover cookbook called Best-Ever Soups by Anne Sheasby, which is just bursting with color photographs. It was in the $5 rack at Borders about five years ago, and I have made a dozen recipes out of it, each with great success. I love it. It should be noted that based on this experience, I snapped up a giant paperback cookbook last year (also in the $5 rack at Borders) called The Essential Pasta Cookbook (with no author, I now see), similarly bursting with color photographs. I have made two recipes from it, and both were tremendously lacking, both in direction and in result. It really is hard to tell a book by its cover. Or even by a quick scan of its recipes, it turns out.

Monday, August 16, 2010

A Meal to Follow a Road Trip

As some of you may know, Elspeth and I just went on a fabulous road trip. I flew to Seattle, we rented a car, and we drove back to Minnesota, meandering through Yellowstone and Grand Teton National Parks, the Black Hills, and the Badlands (also a National Park) along the way. We slept in a tent all but one night (we splurged on a bed and breakfast in Douglas, Wyoming - which may, as it happens, have the saddest downtown in the western United States), and not even one bear tried to eat us. Growing up in Maine, I suspect we didn't imagine that in 2010, driving between the two cities that we feel so comfortable in would involve seeing most of Washington, some of Idaho and Montana, most of Wyoming and South Dakota, and a pretty serious chunk of Minnesota, as well. There are a lot of mountains along the way, and deserts, too. There are cowboys and rodeos and some rolling plant that may have been tumbleweed. There are some particularly grand rivers, and a whole lot of empty fields. I highly recommend the route that we took (which was cleverly planned, down to the very last detail, by Elspeth!).

We ate well along the way (Elspeth brought along homemade chili, and pasta, and risotto(!!) for campsite dinners), and our only fast food stop was a "lunch supplement" as we called it, at an Arby's in central Wyoming on Thursday. In South Dakota on Saturday morning, we ate sourdough pancakes from a recipe that claimed to use a sourdough starter from frontier times, "over a hundred years ago"! All the same, when we arrived in Saint Paul on Saturday night, we were hungry. We swung by the Seward Co-op to get a few essentials, and when we got home, I whipped up a quick dinner. Tortellini (cheese-filled, from the grocery store freezer), with garlic scape pesto (homemade, and stored in my freezer... I'll have to blog about that recipe later), and lots of shredded parmesan stirred in.

What we really wanted, though, after driving 2500+ hours in 6 days, was a salad.

Fresh greens, with an heirloom tomato sliced on top, dressed with an easy and delicious recipe - it's one I wrote down a few years ago from that Everyday Italian show on the Food Network, and as you can see here, I wrote it on cute recipe cards that Elspeth decorated for me as a gift one year for Christmas. As you can also see here, I make this dressing often enough that there's a smudge on the recipe card!

In case you can't quite see it: that is 4 Tbsp of white vinegar, 2 Tbsp of dijon mustard, 2/3 cup of olive oil, and 1 tsp oregano. In this case, I put in a pinch of dried oregano and a pinch of dried basil. And it's true - the recipe makes plenty of dressing. I have a small jar of it in the refrigerator now, which will last through the week!

Tuesday, June 29, 2010

Kohlrabi Potato Gratin, Oh My!


I mentioned already that the fabulous people of Driftless Organics include a newsletter with each CSA box, but I may not have outlined the contents of said newsletter. The first box of the year included a kind of welcome letter, along with a helpful feature on how to flatten the nifty wax coated boxes the veggies come in so that they can be re-used. There is also a brief description of each vegetable included, along with some quick suggestions about how to store them, how to prepare them, or what to match them up with (you know – eat the arugula in five days or less; store the potatoes in a cool dark space; use the green garlic as you would any garlic, but more generously, as it is quite mild). And, last but certainly not least, there is always a recipe or two to help with the most challenging vegetables in the box. This time, that recipe was for the kohlrabi (and also the potatoes and green garlic). I halved it, and discovered that it made a good companion to the meatloaf I made. Matched up with some of my homemade dressing on spinach, I had quite a meal! (If you are noticing that the dressing and the meatloaf are from over a week ago, you're on to me. I wrote this post and forgot to.. well.. post it.)

Kohlrabi Potato Gratin
(serves 3-4 people)

3-4 medium potatoes, whole, unpeeled
2 medium kohlrabi bulbs, whole, peeled
green leaves from the kohlrabi bulbs, stems removed
1 cup green garlic (white and green parts), rinsed well and coarsely chopped
1 cup half & half
2/3 cup shredded/crumbled cheese (I used blue cheese - yum!)
1/2 tsp each of salt, pepper, and nutmeg
2 Tbsp butter
1/4 cup bread crumbs

Preheat oven to 350 degrees.

In medium saucepan with lid, boil whole potatoes and the peeled, whole kohlrabi bulbs for 7-8 minutes, until tender but not soft. Drain into a colander.

Chiffonade de-stemmed kohlrabi leaves (make a pile of flat leaves, roll them up into a log, and slice thinly) and place into the potato/kohlrabi pan with about an inch of fresh water. Bring to boil with the lid and steam for about 2 minutes. Drain.

Cut potatoes and kohlrabi bulbs in half the long way and slice thinly.

Mix together the chopped green garlic, half & half, and the cheese, along with the salt, pepper, and nutmeg.

Put butter in an oven safe pan and place in the hot oven for a couple minutes. Remove and swirl the melted butter to coat. Put half of the potato and kohlrabi slices in the bottom of the pan, lying flat. Spoon 1/3 of the seasoned cream and cheese mixture. Top with another layer of veggies and another layer of cream and cheese. Repeat. Sprinkle with bread crumbs, cover with tin foil, and bake for 20 minutes. Remove foil and bake another 20 minutes, until brown on top and bubbly on the edges. Let sit for about 10 minutes before serving.

Sunday, June 20, 2010

With a bit of planning, an easy easy dinner.

I always want to make pizza at home, with my own crust, my own toppings, just how I like it. But I never decide this until I'm hungry, and I don't want to make the dough, wait for it to rise, and then make the pizza. And because of this, I always have it in my head that homemade pizza is an ordeal, that it's tough to make. But it is SO easy. If you just give your self some time to let the dough rise it is so.easy. So this week, I planned ahead! I made one batch of pizza dough, which makes 3 medium pizzas, so three nights this week I got to make a quick, delicious homemade pizza. And it was glorious, absolutely glorious.

As you can guess, in my quest for a  no nonsense recipe that is absolutely delicious, I went straight to my Cook's Illustrated cook book "The New Best Recipes". I don't know what I would do without it.  I made up the dough, let it rise while I went to an art reception with a friend, came back home to find it bursting through the saran wrap, over the edges of the bowl, and happily rolled it out into a pizza. A few toppings later and my boyfriend and I were enjoying a delicious, cheap and healthy dinner. There are few things I love more than making my own dinner, and this was grand.

For the first night we went for a simple margarita pizza using fresh mozzarella, nice vine tomatoes, basil from my windowsill garden and a nice pizza sauce (which, yes, was store bought...ah well). I encourage you to make one straightforward delicious pizza, and then experiment with the rest.

Pizza Dough from The New Best Recipes 
Makes 3 medium pizzas


Ingredients: 1/2 cup warm water, 1 envelope (about 2 1/4 t) instant yeast, 1 1/4 cups water at room temp, 2 T extra virgin olive oil, 4 cups bread flour*, plus more for dusting the work surface, 1 1/2 t salt, olive oil for oiling the bowl.

* I like to substitute about one cup with corn flour (very fine corn meal), to add a bit to the crust.

Directions: Measure the warm water into a 2-cup liquid measuring cup. Sprinkle in the yeast and let stand until the yeast dissolves and swells, about 5 minutes. Add the room temp water and oil and stir to combine.

Process the flour and salt in a large food processor (or with a whisk, by hand, in a medium bowl).  Pour in most of the liquid ingredients. If using a food processor - pulse as you pour and continue to pulse until a ball forms. If it does not, add more of the liquid, slowly until a ball forms. If working dough by hand, stir with a rubber spatula while you pour. Once all the liquid is in, use your hands to combine the dough and work into a ball, again, adding more liquid as needed. The dough will be a bit tacky.  Turn the dough out onto a lightly floured work surface (using the rubber spatula if needed) and knead by hand for a few strokes to form a smooth, round ball.

Put the dough in a deep oiled bowl and cover with plastic wrap. Let rise until doubled in size, 1 1/2 to 2 hours.  Press the dough to deflate, and break up for the size pizzas you would like, 3 for medium, 2 pieces for large, 4 or 5 for more personal size pizzas. Wrap whatever pieces you're not using in plastic wrap and stick in the fridge - it will be good for a while in there, at least 4 days (in my opinion).


Cooking the Pizza


Preheat the oven to 450/500 degrees for at least 20 minutes before you're ready to stick the pizza in. If you're using a pizza stone, stick that in there too for the heating. If you're not very good at sliding the rolled out pizza onto the cooking surface - keep this in mind when deciding if you want to preheat or not. Preheating will certainly make the crust crispier though.


Roll the pizza crust out on a floured work surface. Sprinkle corn meal on the cooking surface (pizza stone, baking sheet, etc) if you've got it.  Lay the dough on the baking surface, brush with olive oil, poke with the tines of a fork to prevent ballooning, and pre-cook for 5 minutes. While the crust is cooking, finish getting the toppings together.  Pull out the dough after 5 minutes and quick top the pizza to your liking. If you're using any meat or big toppings, consider pre-cooking them in a saute pan before adding them to the pizza. Also try to remove as much moisture as you can from things before putting them on the pizza. De-seed tomatoes, press fresh mozzarella with a dish cloth, etc.


Cook for 5-10 more minutes, checking every few minutes. Remove the pizza from the oven when the crust is beginning to turn golden and the toppings look done.  Slice, serve and enjoy!

Friday, June 18, 2010

Surprise!

A funny thing happened last week as I sorted through my enormous box of CSA vegetables: I suddenly realized that what I really needed to add to the mix was some meat! There’s something incredibly comforting about meatloaf, and I find my mother’s recipe to be just the ticket. I’m sure (in fact, I know) that there are meatloaf recipes that involve combinations of meat, fresh herbs, carefully selected fillers, rare mushrooms and such. I don’t bother myself with those recipes. This one is tried and true, and with the standard items that I keep in my cabinets and refrigerator, the only ingredient I ever need to buy in order to make this recipe is the ground beef!

Meatloaf (as my mom makes it)
1 egg
2 Tbsp ketchup
1 Tbsp worcestershire sauce
3/4 tsp chili powder
ground pepper
1/4 tsp dried marjoram
1 tsp dried parsley
1/2 tsp dried basil
garlic powder (just a shake or two)
1/8 cup grated onion (do grate it, rather than dicing it)
1/2 cup milk
1 cup oats
1 1/2 lbs ground beef

Topping:
4 Tbsp ketchup
1 Tbsp brown sugar

Combine all of the ingredients except the ground beef. Mix them well before adding the ground beef. The mix that well, too. Place in a loaf pan and bake at 350 for 45 minutes - then remove from the oven, add the topping (which you should mix together first), and then bake another 15 minutes. Enjoy!

Friday, May 28, 2010

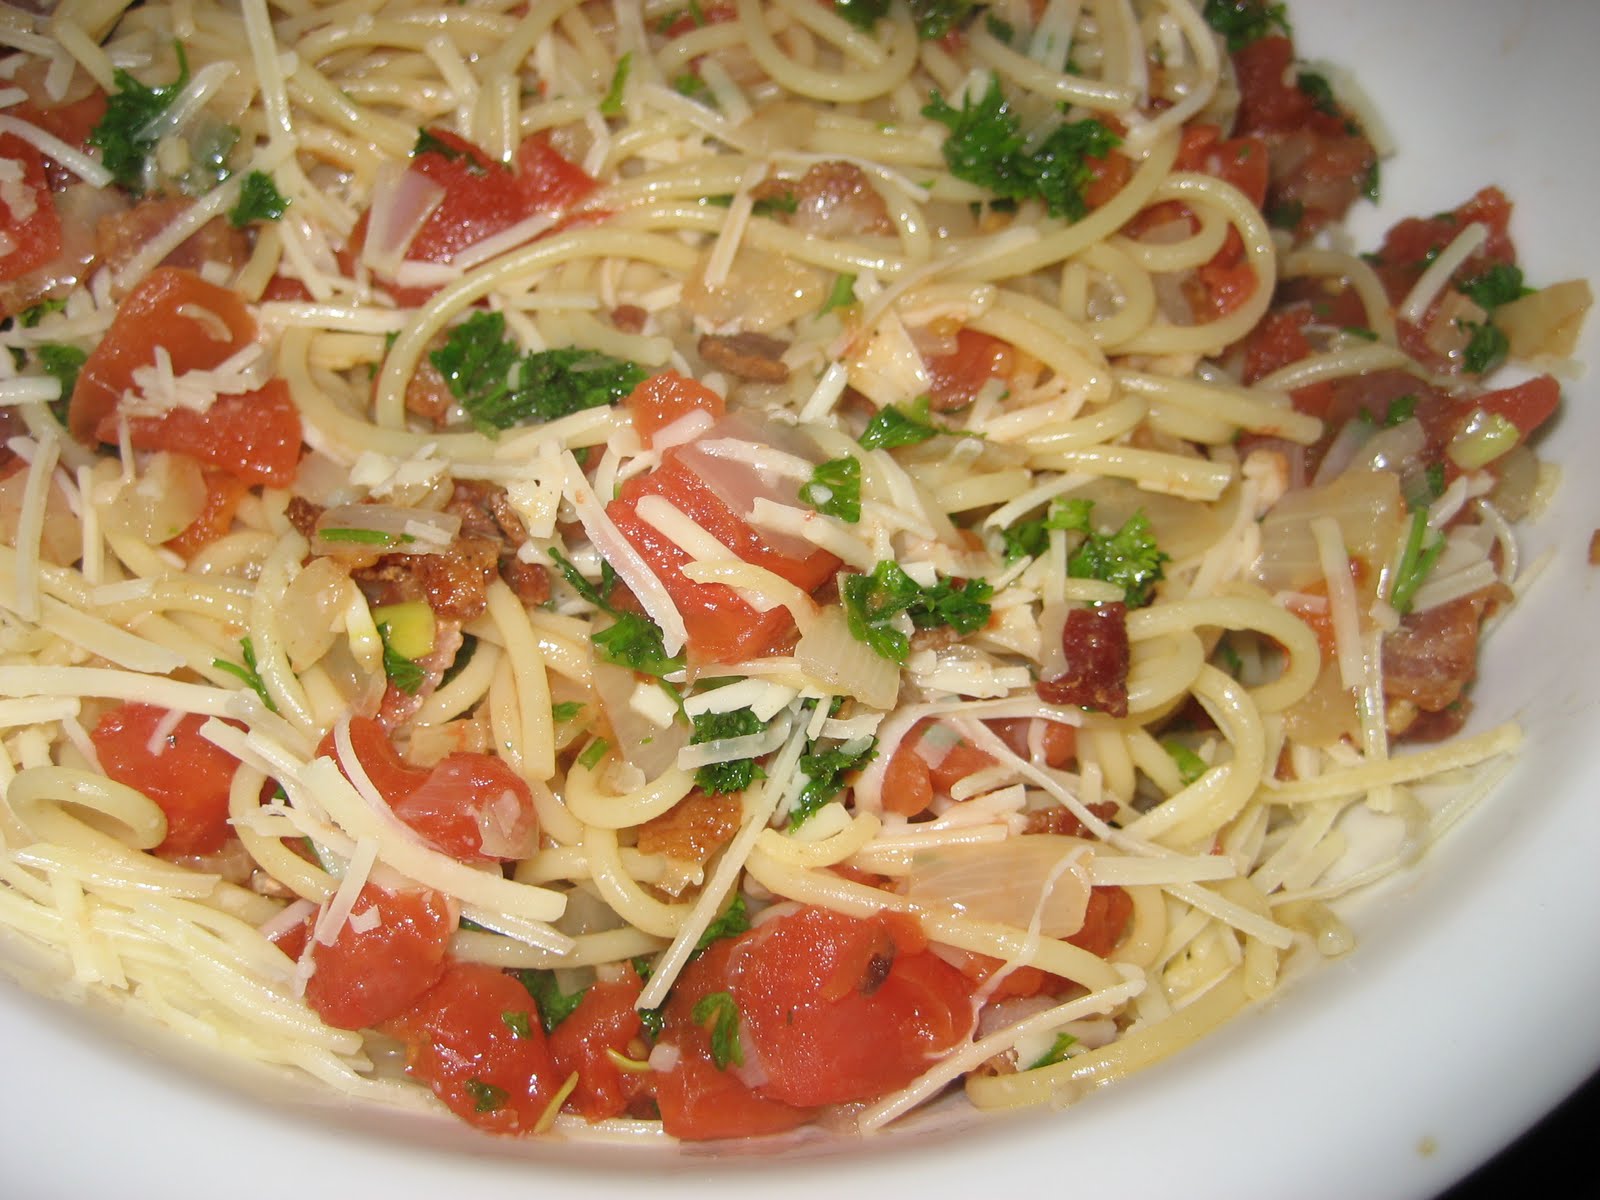
Pasta with Tomato, Bacon, and Onion

As has recently been discussed here, the America's Test Kitchen recipe booklet that I have (issue 2, 2008) is a source of recipes that does not disappoint. I've made other versions of this recipe in the past, and the bacon tends to be soggy. This recipe eliminates that problem - and also advocates the use of pasta water in the sauce, which I keep seeing lately.

I should mention that for over a year now, most of the meat I've been cooking with has been local and organic, purchased from the completely fabulous Seward Coop, of which I am a member. This is true of the bacon used here.

Pasta with Tomato, Bacon, and Onion
Serves 4 (and generously, at that). I halved the recipe without any problem, and still ate it for two dinners and a lunch.

6 slices bacon, chopped
1 onion, chopped fine
1 garlic clove, minced
1/2 tsp red pepper flakes
2 (14.5 oz) cans diced tomatoes
salt
1 lb spaghetti or linguine
1/4 cup chopped fresh parsley

Bring water to boil in large pot. Cook bacon (already chopped) in large skillet over medium-high heat until crisp, about 5 minutes. Transfer bacon to paper towel-lined plate and pour off all but 2 Tbsp fat. Add onion to skillet and cook until softened, about 5 minutes. Add garlic and pepper flakes and cook until fragrant, about 30 seconds. Add tomatoes and simmer until slightly thickened, about 10 minutes.

Add 1 Tbsp salt and pasta to boiling water and cook until al dente. Reserve 1/2 cup cooking water, drain pasta, and return to pot. Add tomato sauce, parsley, and cooked bacon to pot and toss to combine, adding reserved pasta water as needed. Season with salt. Serve, topped with grated Parmesan cheese.

Tuesday, May 25, 2010

Garlic Shrimp with Basil, aka Heaven


This is not the first time (nor will it be the last) that I have celebrated the existence of the America's Test Kitchen crew. In the fall of 2008, I visited Elspeth in Seattle and we were lucky enough to catch a presentation by Christopher Kimball at the public library. We got there early, and were each rewarded for our efforts with a copy of "America's Test Kitchen: Fast & Fresh Recipe Card Collection" - apparently it was Issue Number 2 of this handy booklet that looks like a magazine but reads like a cookbook. To date, I have made nine of the recipes that are included (some of them more than once), and always with great success. That means that there are 55 recipes remaining, and the more I think about it, the more sure I feel that I better get a move on with trying each of them!

This round, I tried the "Garlic Shrimp with Basil" recipe, and it will now be my official "impress the guests" dinner, though I made it on a weeknight in significantly less than an hour. It tastes, as I mentioned in the title of this post, rather like heaven.

Garlic Shrimp with Basil
(serves 4, or in my case: serves 1 for dinner, a lunch, and one more dinner)

1 1/2 pounds extra large shrimp, peeled and deveined
salt and pepper
2 Tbsp olive oil
10 garlic cloves, minced
3/4 cup white wine
1 (14.5 oz) can diced tomatoes
1/2 cup finely chopped fresh basil
4 Tbsp butter, cut into 4 pieces
2 Tbsp capers, drained and minced
1 tsp lemon juice

Pat shrimp dry with paper towels and season with salt and pepper. Heat 1 Tbsp oil in large nonstick skillet over medium-high heat until just smoking. Add shrimp and cook until lightly browned, about 1 minute per side. Transfer to plate. (NOTE: I bought a 1 lb. bag of frozen cooked shrimp, defrosted it in the refrigerator over night, and followed these same directions. This worked well, though it was 1/2 lb less shrimp than the recipe calls for. It seems that cooked or uncooked shrimp are kind of interchangeable in this recipe, too.)

Add remaining oil, garlic, and 1/2 tsp pepper to empty skillet and cook until fragrant, about 30 seconds. Stir in wine and tomatoes and simmer until slightly thickened, about 5 minutes. Off heat, whisk in basil, butter, capers, and lemon juice. Add shrimp and any accumulated juices to skillet. Cover and let sit until shrimp are heated through, about 5 minutes. Season with salt and pepper. Serve.

This can be served on linguine, rice, or crusty bread (says the recipe) but I served it on egg noodles, which was delicious.

Saturday, May 22, 2010

Chicken and Ramps!


Around the Twin Cities this spring, ramps were the trendy "new" vegetable to be aware of, as far as I can tell. It seems that they are a variety of wild leek, and in certain parts of the country in the early spring, you can purchase them in the sorts of produce sections that pride themselves on carrying such items. Since I happen to frequent a produce section of that sort, I purchased some ramps and went about learning what they are and how to cook them. Turns out, it was easy. I washed them, chopped them up, and sauteed them in butter. They were delicious.

Ramps are not what one would consider to be a hearty vegetable, so I definitely needed to eat some other food along with this buttery ramp concoction. And so, I bring you, the chicken recipe off the Hellman's Mayonnaise jar. Don't be alarmed. In fact, if you can, just ignore the source of this recipe entirely, because I'll tell you right now that it results in some very delicious chicken, quickly and easily. I should mention that I halved this recipe, and eyeballed the ingredients, and it was still delicious:

Parmesan Crusted Chicken
1/2 cup mayonnaise
1/4 cup Parmesan cheese
4 boneless, skinless chicken breast halves
4 tsp seasoned dry bread crumbs

Combine mayonnaise and cheese. Spread on chicken, then sprinkle with bread crumbs. Bake at 425 for 20 minutes or until thoroughly cooked.

Easy! Also, I'm a sucker for egg noodles, so I cooked some of those up to eat with the ramps and chicken. The next night, I chopped up the leftover chicken and stirred it in with the leftover ramps and leftover noodles, and I have to say that this was even more delicious than the original meal, when the components had been kept separate!

Thursday, April 15, 2010

Shredded Pork Tostadas Made Simple

I love shredded pork. I also love fresh tacos, tostadas, etc that are full of meat and flavor but don't feel heavy. I had some people over for dinner tonight and was having trouble figuring out what to make. Whenever I want to make something nice that feels like a complete meal, I end up cooking very New England-y things. While the food is delicious, it's often warm, filling, hearty food. Bakes beans, roasted chicken with mashed potatoes, chili, beef stew, etc. So I was perusing my go-to cooking source - Cook's Illustrated (I subscribe to both the periodical and the online site) and there it was. The perfect recipe for this warmer, sunnier week in Seattle. Crisp Pork Tostadas or 'Tinga Tostadas' put simply, as tinga is the term for 'true Mexican shredded pork' according to Cook's Illustrated.


Wow. This was easy, impressive looking and delicious! I cooked the pork last night so that when I got home from work today, all I had to do was put the pork in the pan with a few more bits of seasoning, let it cook for 15 minutes in all and crisp the tortillas to make the tostadas. Ta da. Dinner served with a fairly clean kitchen to boot.

Crisp Pork Tostadas (from Cook's Illustrated, March 2010) Serves 4 to 6

Tinga (can be made the night before through Step 1)

Ingredients: 2 lbs boneless pork butt (or shoulder), trimmed of excess fat and cut into 1-inch pieces, 2 medium onions, 1 quartered and 1 chopped fine, 5 medium garlic cloves, 3 peeled and smashed, 2 minced, 4 sprigs fresh thyme, table salt, 2 T olive oil, 1/2 t dried oregano, 1 (14.5) oz can tomato sauce, 1 T ground chipotle powder, 2 bay leaves.

Directions: Bring pork, quartered onion, smashed garlic, thyme, 1 t salt and 6 cups of water to simmer in a large saucepan over medium-high heat. Skim off any foam that rises to the surface. Reduce heat to medium-low, partially cover and cook until pork is tender 75 to 90 minutes. Drain the pork through a strainer into a pyrex or bowl. Dump all but 1 cup of cooking liquid, reserving it to be used later in the recipe. Remove the onions, garlic and thyme and return the pork to the saucepan. Use a potato masher to smoosh the meat until it has shredded into rough pieces. Set aside. If you're making the meat the night before, put it in a airtight container and refrigerate it.

On the night of the meal, heat olive oil over medium-high heat in a 12 inch non-stick skillet or a broad, heavy bottomed pan such as a dutch oven. Once oil is shimmering, add shredded pork, chopped onion and oregano; cook, stirring often, until pork is well browned and crisp, 7 to 10 minutes. Add minced garlic and cook until fragrant, about 30 seconds. Stir in the tomato sauce, chipotle powder, the reserved pork cooking liquid and the bay leaves. Simmer until almost all of the liquid has evaporated, 5-7 minutes. Remove and discard the bay leaves and season the tinga with salt.

Tostadas

Ingredients: 3/4 cup vegetable oil, 12 (6-inch) corn tortillas, table salt

Directions: Heat vegetable oil in an 8-inch heavy bottomed pan (such as a cast iron skillet) over medium heat. Allow the oil a bit of time to get hot (a few minutes is fine), using a fork, poke the center of each tortilla a few times (to prevent puffing). Fry 1 tortilla at a time, placing it in the pil and holding a metal potato masher upright to keep the tortilla submerged and to provide even cooking. Keep the tortilla submerged for 45-60 seconds, until it is crisp and lightly browned. Drain on a paper towel-lined plate and season with salt to taste if you wish (I found this step unnecessary). Repeat with remaining tortillas.

To serve: Spoon a small amount of shredded pork onto each tostada and serve. Garnish with any variety of the following: Queso fresca or feta cheese, fresh cilantro leaves, sour cream, diced avocado, lime wedges. Of course, feel free to experiment with garnishes but I think these are the best ones (and so do the folks at Cook's Illustrated). I also reserved a bit of the diced onion when I dumped it into the pork and used it for garnish.

Sunday, April 4, 2010

Salmon Cakes and Broccoli


When I was home for Christmas I had a chance to peruse an issue of Eating Well, which was both interesting and bursting with promising recipes. I read a feature about canned salmon, and ever since then, I've been intending to purchase canned salmon and do something with it! Last week, I revisited this intention by, well, doing just that.

With a quick effort on Eating Well's comprehensive website, I pulled up a recipe for salmon cakes, and promptly decided that half of such a recipe would be plenty of food for my one-person dinner! It occurred to me that salmon cakes, by themselves, weren't quite a meal... so I also pulled out a favorite cookbook of mine: For Goodness Taste, produced by the Junior League of Rochester! That's Rochester, New York, and the cookbook is much like you might imagine it - the ladies of the Junior League appear to have gathered up family favorites, thrown them into categories, and printed themselves a cookbook! I am lucky enough to own a copy, and I flipped through the flagged pages until I found a good companion for salmon cakes: Broccoli with Lemon Cream Sauce. As a bonus, one recipe needs an egg white, and the other recipe needs an egg yolk! Waste not, want not.

Here are the recipes, as I cooked them. I ended up only cooking half the salmon cakes, and when I cooked up the other half the next day, they were even more delicious. The recipe takes about 15 minutes from start to finish, so if you can mix it a day ahead of time, then it'll take about 8 minutes to do that... and another 7 minutes to cook them whenever you're ready to eat.

Salmon Cakes (2 servings)

Combine:
1 (6-7 oz) can of boneless, skinless, Wild Pacific salmon, drained
1/4 cup finely chopped red onion
1 egg and 1 egg white, lightly beaten
1.5 tsp grainy mustard
1 tsp dried dill
1/4 tsp ground pepper
1/8 tsp salt

Add:
2 cups frozen shredded hash browns (I found a brand called Mr. Dell's in the frozen vegetable section. There are other brands in the processed frozen breakfasts section, too.)

Mix this together, and shape the cakes. (Make them one at a time, packing them into a one cup measure, and then turning them into the pan, and flattening with a spatula to create 3-inch cakes.) Heat 1 Tbsp olive oil in a pan (mine is cast iron, which I recommend), and cook the salmon cakes, 3-5 minutes on each side.

Serve with ketchup, sour cream, or this sauce:
1/3 cup sour cream
1.5 tsp capers, chopped and rinsed
1/2 tsp lemon juice

Broccoli with Lemon Cream Sauce

Steam and drain one bunch of broccoli. In a small saucepan over medium heat, melt 2 Tbsp butter. Stir in 1 cup of half and half, and heat to boiling. Boil 5 minutes until mixture is slightly reduced, stirring often; remove from heat. Stir a small amount of mixture into an egg yolk, lightly beaten. Slowly combine this combination back into the saucepan. Stir in 1/4 tsp salt and 1 Tbsp lemon juice. Return to heat and cook on low, stirring constantly, for 2 minutes.

Pour sauce over broccoli and serve immediately.

Thursday, March 4, 2010

Oatmeal Cookies

Well folks, I've been doing a fair amount of cooking lately, but I've been bad about posting. Early in dating, my boyfriend and I wrestled a fiesty, very large (3 1/3 lb) dungeness crab into a pot and after picking the meat he made delicious crab cakes. On Valentine's Day, we avoided the crowds and instead stayed in and cooked one of our favorite cuisines - Ethiopian! We made Doro Wat, Lamb Tibs, red lentil stew (which I can't recall the name of) and greens. We made injera too, but that wasn't quite so successful, though I'm not giving up! When I find my misplaced cookbook, I will post the recipes for those items, and some pictures too.

As for the this post, as the title suggests, we made oatmeal cookies last night. They are so delicious. The cookie dough from oatmeal cookies is by far the best cookie dough, the cookies themselves are delightful, and they are so easy to make. And they have oatmeal in them, so they've got to be kind of good for you, right? Excellent.

Ingredients: 1/2 cup brown sugar, 1/2 cup sugar, 1/2 cup butter (1 stick, cut into smaller pieces), 1 egg, 1 t vanilla, 1 T milk, 1 1/2 cups flour, 1/2 t baking powder, 1/2 t baking soda, 1/2 salt, 1 cup rolled oats, 1 cup chocolate chips, raisins, and /or nuts (optional).

Directions: In a medium bowl, mix together the sugars and butter, blend a bit with a mixer, and then add the egg, vanilla and milk. Blend until smooth. Add the flour, baking powder, baking soda and salt. Blend well. Add oats and stir with a spoon or if you have a strong mixer, continue to blend. If you so desire, add in any other ingredients (though I like my cookies pure!).

Cook at 350 degrees F for 10-12 minutes. Let cool, serve warm with milk(okay, okay, serve however you wish with whatever beverage, but warm with milk is the best way)!